Wednesday, February 17, 2010

Best. Chicken. Sandwich. Ever.

I can't explain how much I love this sandwich!  There is a local chain of restaurants in this area that makes a chicken sandwich that is out of this world!  I actually crave it! I decided to see if I could recreate a similar version at home.
First, you'll need to gather the ingredients.  You'll need chicken (you can grill a chicken breast or use some of a rotisserie chicken), bacon, brown sugar, chili powder, honey mustard, buns, and sliced cheese (I used provolone).  

Make a mixture of brown sugar and chili powder- maybe 1/2 cup or so of brown sugar and 1 1/2 tablespoons of brown sugar.  Use your best judgment.  Take your bacon and kind of pat it into the mixture, coating both sides with the mixture.  Then, I cracked fresh black pepper on the bacon- pretty heavy with the pepper.  Bake it at 350 degrees for 10-12 minutes (or whatever your package directions say).  You'll want the bacon to be on the crisper side.

Toasting the bun is optional, but I think it's better that way.  Then, put the rotisserie chicken (or grilled breast) on the bottom half of the bun with a little honey mustard (you really can't have too much honey mustard).  Then, put your slice of provolone on top of the chicken.  Pop it into the over for a few minutes, so the cheese can melt over the chicken.

Put honey mustard on the top half of the bun.  Finally, Put 2 slices of bacon on top of the cheese and cap it off with the top of your bun!

Now, get ready to taste the best chicken sandwich ever!!!!!   


I served it with baked garlic, sweet potato fries!  Yum!


It's definitely not the healthiest recipe, but it's gooey and tangy and a little bit sweet!  You have to try it!!!!

Sunday, February 14, 2010

Dinner for 2

We typically don't have a huge celebration for Valentine's Day.  While I think it's imporant to recognize the one you love and celebrate your togetherness, I don't think it requires an expensive dinner, jewelery and dozens of roses.  I'm perfectly happy making a meal with Jeremy and enjoying a quiet dinner at home!  Which is exactly what we did!!!!
Dinner for Two Menu
Butter Chicken
Broccolini
Rice
Molten Lava Cakes
with Blue Bell Vanilla Ice Cream


I found the recipe for Butter Chicken on the Tasty Kitchen website- they have great recipes.  I really liked the butter chicken and it's pretty simple to prepare, but lots of the reviews said "best chicken ever" and I don't think I would go that far.  But very tasty nonetheless!

You can find the recipe for Butter Chicken here!


If you haven't tried broccolini, you're really missing out.  It's more delicate and tender than regular broccoli.  It is often mistakenly referred to as baby broccoli, but it's actually a hybrid between broccoli and a Chinese broccoli.  I'll spare you the specifics!  You should definitely give it a try!  It's available in most stores (if I can find it in OKC, you should be able to find it, too!).  I roasted it and used a sauce with garlic, dijon mustard, and balsamic vinegar.  Yum!


Let's move on to the real star of this show!  Dessert!


This recipe came straight from Mrs. Paula Deen.  I think you're gonna love it!  I substituted Bailey's Irish Cream for the Grand Marnier, because a) that's what I had at my house and b) I don't like orange and chocolate together.  I think it turned out well, so feel free to use one of your favorite "flavorings."

 Molten Lava Cakes


6 (1-ounce) squares bittersweet chocolate
2 (1-ounce) squares semisweet chocolate
10 tablespoons (1 1/4 stick) butter
1/2 cup all-purpose flour
1 1/2 cups confectioners' sugar
3 large eggs
3 egg yolks
1 teaspoon vanilla extract
2 tablespoons orange liqueur

Preheat oven to 425 degrees F.

Grease 6 (6-ounce) custard cups. Melt the chocolates and butter in the microwave, or in a double boiler. Add the flour and sugar to chocolate mixture. Stir in the eggs and yolks until smooth. Stir in the vanilla and orange liqueur. Divide the batter evenly among the custard cups. Place in the oven and bake for 14 minutes. The edges should be firm but the center will be runny. Run a knife around the edges to loosen and invert onto dessert plates.


I baked mine just a tad too long- they could have been a little gooey-er, but still delicious!  And the vanilla ice cream is the perfect compliment!!!


I thought we looked a little sleepy in this pic . . .


Ah, much better.


Hope you had a lovely Valentine's!!!

Saturday, February 13, 2010

Heart Cookies

I love, love decorating cookies for the holidays.  And Valentine's is the perfect holiday!  Pink and red frosting, heart shapes- LOVE it!  My friend Jennifer came over on Saturday to help me complete the decorating.  It was a BIG job!  Somehow, we didn't get a pic of us decorating : (  Next time!

I borrowed the frosting recipe from the decorated cookie blog.  She has lots of really cute ideas for decorating cookies.  She's definitely a pro, so please don't compare my work with hers! 

Here is her frosting recipe:


"Note: This frosting is similar to royal icing, but I add shortening and flavoring to make it taste delicious. Thus, it dries hard enough to handle and pack when left overnight, but not rock hard, like traditional royal icing. The consistency is NOT the runny kind used for flooding. It's stiffer. Take a spoonful, turn it over the bowl. The frosting should cling to the spoon and slowly fall into the bowl. That's the right consistency.

4 tblsp meringue powder (available at many supermarkets and in most craft stores)
1/2 cup water
6-7 cups confectioner's sugar (may need more or less, see the consistency advice above)
1 tsp vanilla extract
1/4 cup Crisco

Whip the meringue powder and water on high speed for a looooong time, several minutes, until it's fluffy and peaks form. Gradually add the rest of the ingredients to desired consistency. Store at room temperature in a sealed container for up to a month."


She's not kidding- it is a loooooooooooonnnnngggg time for whipping the meringue powder and water. Be patient. I made this recipe exactly and added the colors that I wanted. I used the thick consitency frosting and put into bags with tips that we could pipe onto the cookies. I added a few teaspoons of water to a little bit of the frosting and put that into squeeze bottles. We were able to outline with the piping bags and flood with the squeeze bottles.


It sounds like work, but it's really easy once you get it set up.


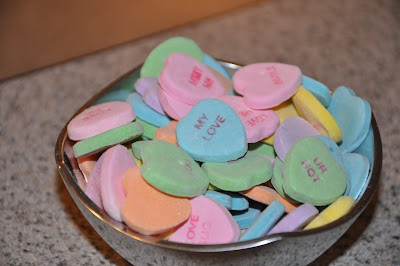
On Sunday, our life group from church came over for our Bible study and dessert.  I served the cookies that Jenn and I decorated, chocolate covered pretzels, conversation hearts, Thin Mint Girl Scout Cookies.  And some chocolates.  It was a little cookie/ candy buffet.

I forgot to get a picture of the chocolate covered strawberries.  Super easy to make!  My number one tip is to make sure your strawberries are really dry.  Just a little bit of water in your chocolate can make the chocolate gummy and there is no saving it!


Happy Cookie Decorating!

Monday, February 8, 2010

Snow & Sweaters


We woke up to huge, giant snowflakes falling to the ground.  It was beautiful!  Ivy and Win love the snow.  But it was so cold!

It was time to try out their new sweaters from Aunt Etta!


 Much better!

 They ran and ran and ran and played!

 Winnie

Ivy

This pretty much sums up Ivy and Win!

Friday, February 5, 2010

Blondes have more fun!

Do blondes really have more fun?  Hard to say, but these blonde brownies are different and delicious.  They are a little bit chewy with the perfect amount of chocolate.  This has been a family recipe for as long as I can remember.  If you haven't made them yet, you should give them a try!


Blonde Brownies

INGREDIENTS:

2 2/3 cup sifted all-purpose flour
2 1/2 teaspoon baking powder
1/2 teaspoon salt
2/3 cup butter
2 ¼ cup packed brown sugar
2 eggs
1 teaspoon vanilla extract
1 cup semisweet chocolate chips


DIRECTIONS:

1. Preheat oven to 350 degrees F.

2. In saucepan, melt butter- remove from heat and add brown sugar.

3. Add the eggs 1 at a time, beat well. Add vanilla.

4. Add dry ingredients.

5. Pour into greased 9 x 13 inch pan. Sprinkle chocolate chips on top. Bake for 25 to 30 minutes.


The bars are pretty firm and really easy to get out of the pan.  Perfect for serving!


Yummy!

Tuesday, February 2, 2010

Lemon Blossoms

These are light, lemony and so good!   And really-- very easy to make! We were having a tea type event at work and I thought these would be perfect.  They are not as heavy and sweet like a cupcake or brownie.  And they are the perfect bite size.  I think the best part is the glaze, but Jeremy liked eating them without the glaze!
The recipe is from the Butter Queen herself- Ms. Paula Deen.


Lemon Blossoms

Ingredients:

18 1/2-ounce package yellow cake mix
3 1/2-ounce package instant lemon pudding mix
4 large eggs
3/4 cup vegetable oil

Glaze:

4 cups confectioners' sugar
1/3 cup fresh lemon juice
1 lemon, zested
3 tablespoons vegetable oil
3 tablespoons water

Directions:

Preheat the oven to 350 degrees F.

Spray miniature muffin tins with vegetable oil cooking spray. Combine the cake mix, pudding mix, eggs and oil and blend well with an electric mixer until smooth, about 2 minutes. Pour a small amount of batter, filling each muffin tin half way. Bake for 12 minutes. Turn out onto a tea towel

To make the glaze, sift the sugar into a mixing bowl. Add the lemon juice, zest, oil, and 3 tablespoons water. Mix with a spoon until smooth.

With fingers, dip the cupcakes into the glaze while they're still warm, covering as much of the cake as possible, or spoon the glaze over the warm cupcakes, turning them to completely coat. Place on wire racks with waxed paper underneath to catch any drips. Let the glaze set thoroughly, about 1 hour, before storing in containers with tight-fitting lids.